Blog
How to create a new tenant in Azure AD
The Azure Active Directory (Azure AD) portal allows you to do all administrative activities, including creating a new tenant for your business. In this guide, you will discover how to construct a fundamental tenancy for your business.
How to create a new tenant for your organization
1. Sign into your organization's Azure portal.
2. From the Azure portal menu, select Azure Active Directory.
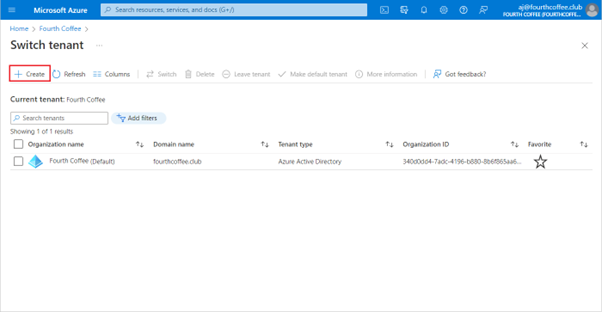
3. On the overview page, select Manage tenants.
4. Select Create.
5. On the Basics tab, select the type of tenant you want to create, either Azure Active Directory or Azure Active Directory (B2C).
6. Select Next: Configuration to move on to the Configuration tab.
7. On the Configuration tab, enter the following information:
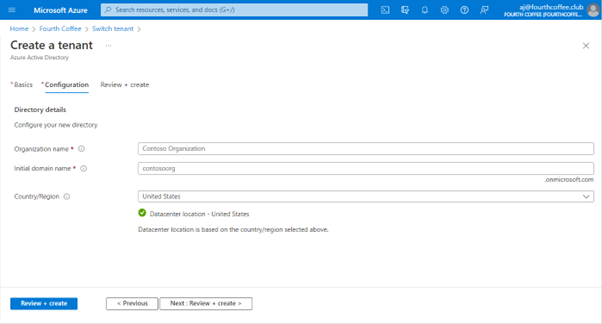
- Type Contoso Organization into the Organization name box.
- Type Contosoorg into the Initial domain name box.
- Leave the United States option in the Country or region box.
8. Select Next: Review + Create. Review the information you entered and if the information is correct, select create.
Your new tenant is created with the domain contoso.onmicrosoft.com.
User account in the new tenant
You are the first user of any new Azure AD tenants that you establish. The Global Admin position is automatically given to you as you are the initial user. You are by default also identified as the tenant's technical contact. You may modify the technical contact details in the Properties section.
How to clean up resources
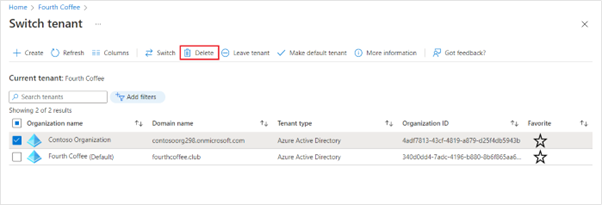
The actions below can be used to remove the tenant if you decide not to use this application any longer:
- Verify that you are logged in to the directory you wish to remove using the Azure portal's Directory + subscription filter. If necessary, switch to the target directory.
- Select Azure Active Directory, and then on the Contoso - Overview page, select Delete directory.
The tenant is deleted along with all related data.
For more information please visit Microsoft
