Blog
A Guide on How to Configure Microsoft Azure Backup for an On-Prem File Server

Introduction
In today's digital age, protecting your data is more critical than ever. Whether you are a business owner in Cyprus or an IT professional in Athens, understanding how to utilize cloud backup solutions such as Microsoft Azure Backup can prevent data loss disasters. This guide will provide a comprehensive overview of setting up Azure Backup to secure files on a local file server. If you are seeking a reliable Microsoft Azure partner in Athens or expert Microsoft Azure services in Cyprus, you have come to the right place. At IBSCY, we rely on Mars as our Azure Backup solution to ensure our data remains secure and easily recoverable.
What is Microsoft Azure Backup?
Azure Backup is a service offered by Microsoft that enables the backup of data to the Microsoft Azure cloud. This service is designed to be adaptable, secure, and cost-efficient, providing an effective solution for individuals and organizations seeking to back up critical data from on-premises servers to the cloud. It is particularly advantageous for businesses lacking a dedicated team of Microsoft Azure engineers but requiring comprehensive data protection.
Why is Azure Backup Important?
In the contemporary digital landscape, data loss can have devastating consequences. Azure Backup is crucial as it serves as a protective measure, safeguarding your data against hardware malfunctions, human error, or cyber threats. It offers user-friendly management through a straightforward web interface, making it accessible to individuals regardless of their IT proficiency. Additionally, it is cost-effective since charges are based solely on the storage consumed, eliminating the need for substantial initial investments. Azure Backup also enhances data security and assists businesses in meeting compliance requirements by encrypting data and maintaining it for designated periods. This makes it an indispensable tool for ensuring the reliable and secure protection of your data.
STEP-BY-STEP GUIDE TO CONFIGURE AZURE BACKUP
Step1: Set up an Azure Subscription
To utilize Azure Backup, an active Azure subscription is required. If you do not have an existing subscription, you may create one via the Microsoft Azure website. Upon activation of your subscription, please log into the Azure portal.
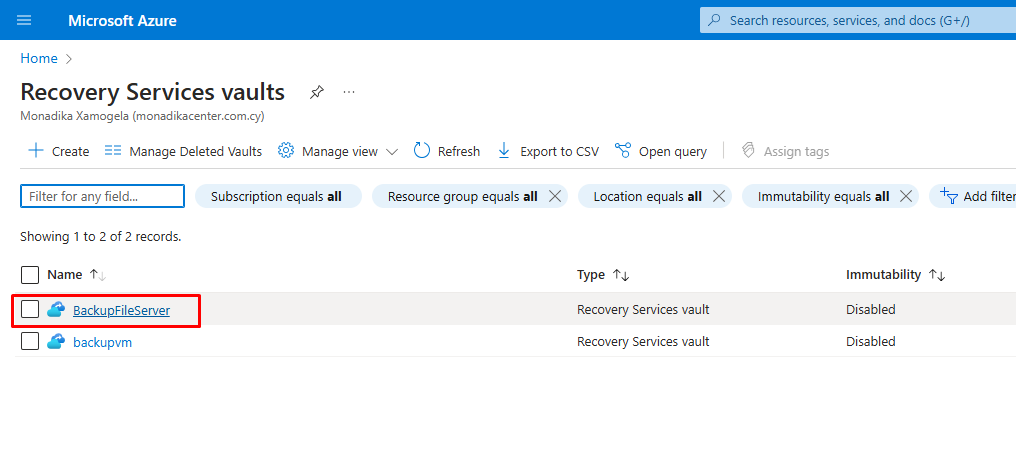
Step 2: Create a Recovery Services Vault
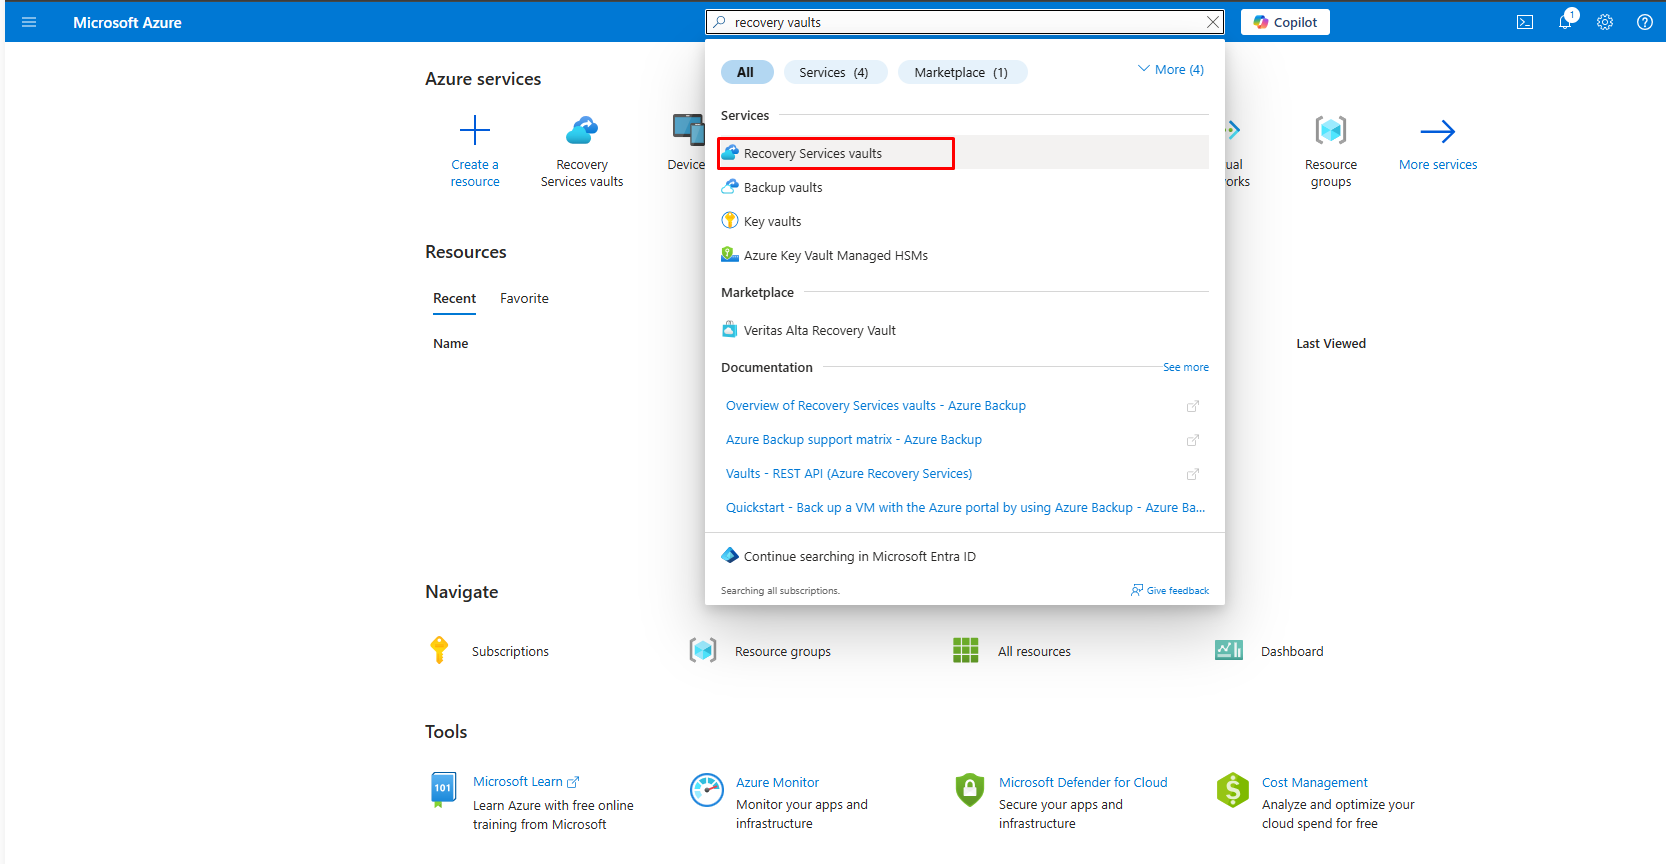
- In the Azure protal, click on "All Services" and search for "Recovery Services vaults".
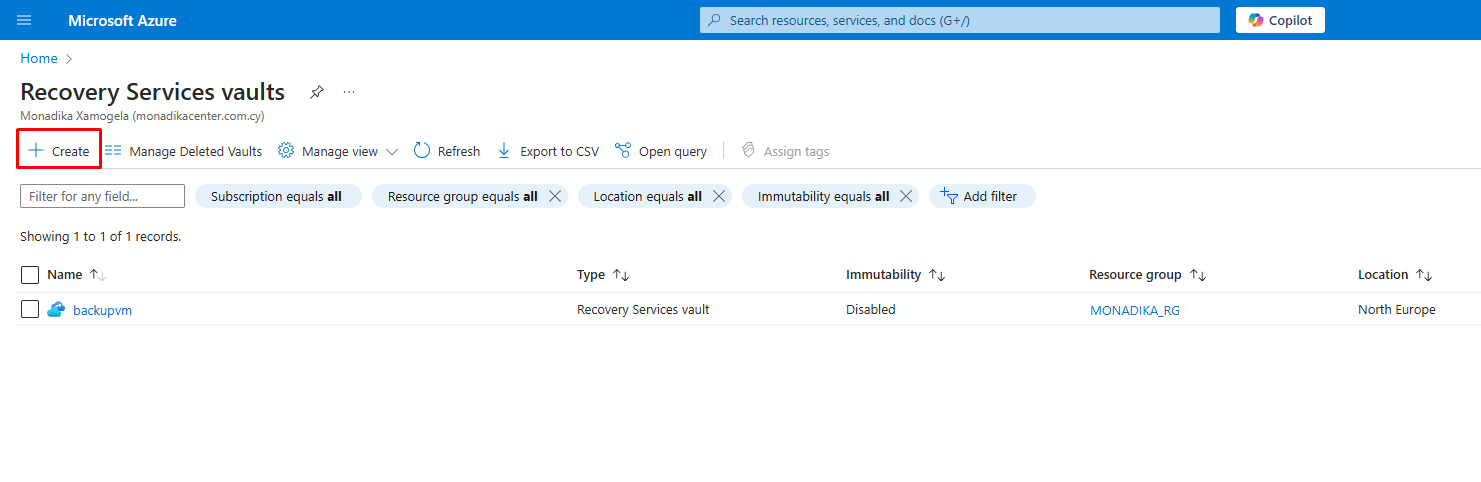
2. Click on "Create" to start setting up a new vault.
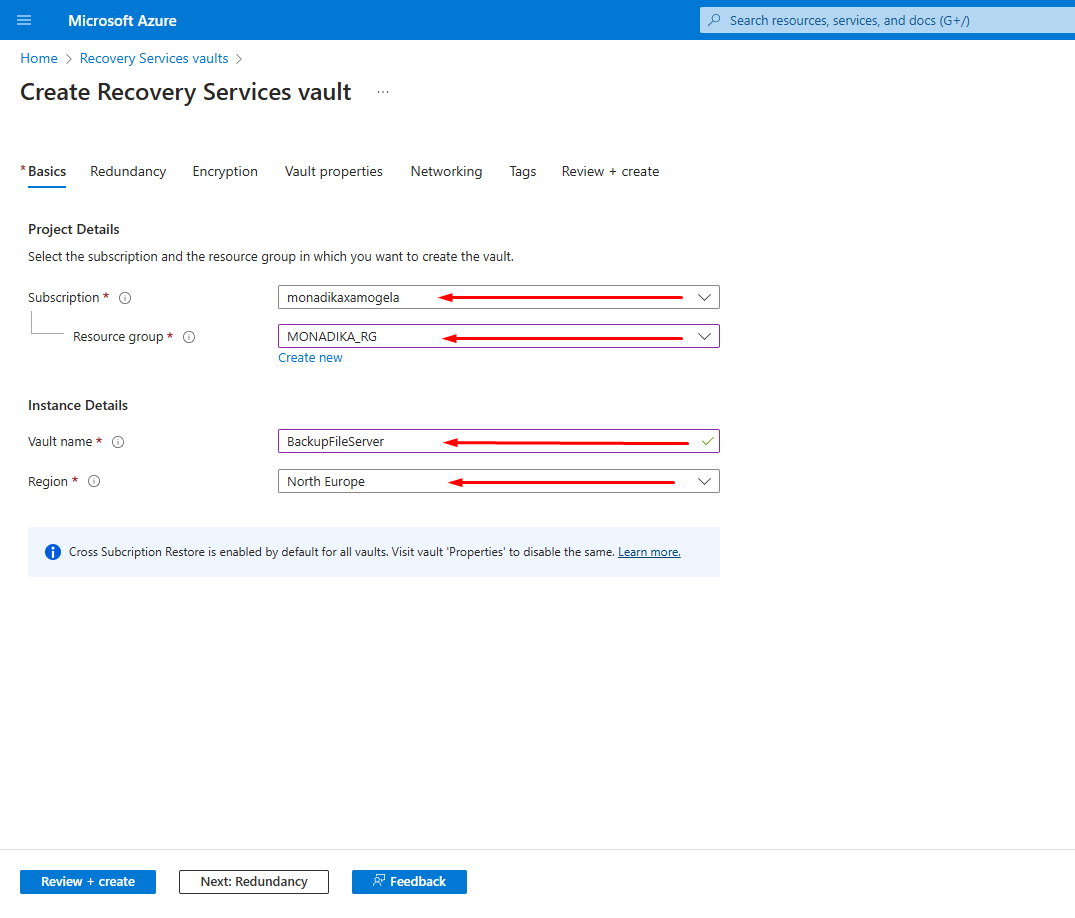
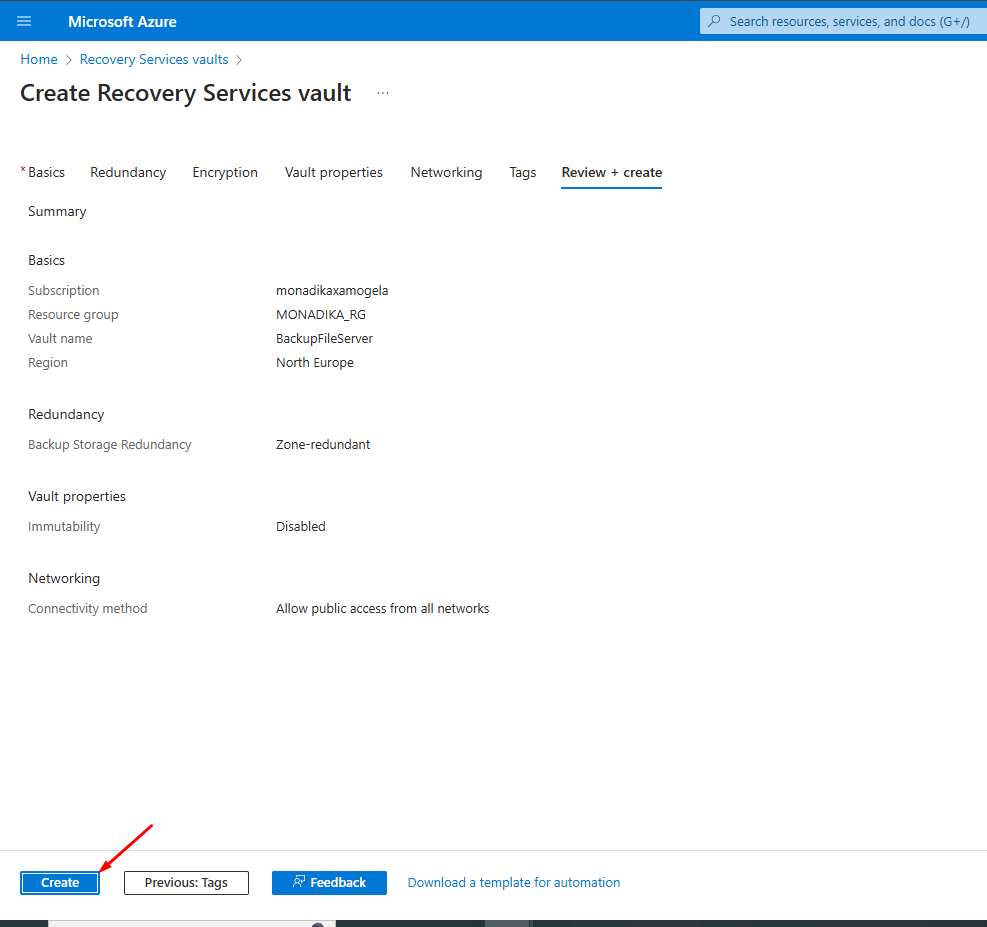
3. Provide a name for the vault, select the subscription, and choose a resource group. For location, select the region nearest to your physical location for optimal performance. Then, click "Review + create" followed by " Create" to deploy the vault.
4. Next, select the vault you set up
5. Click on Backup
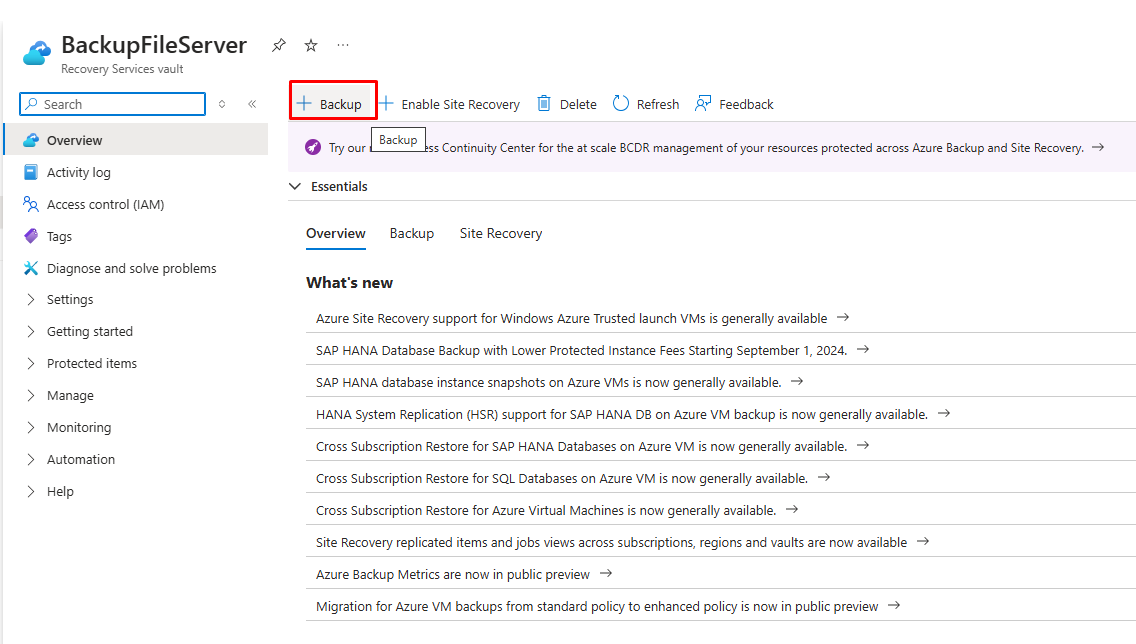
6. Select where your data is stored and decide what to back up
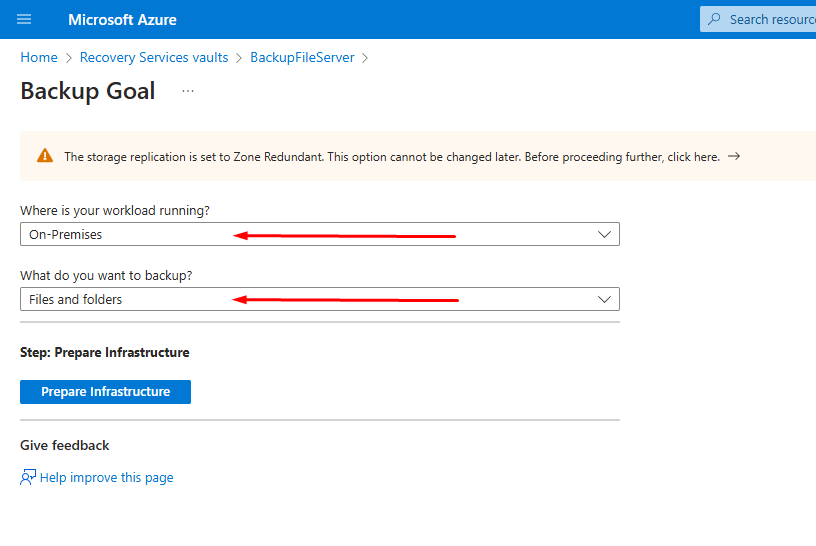
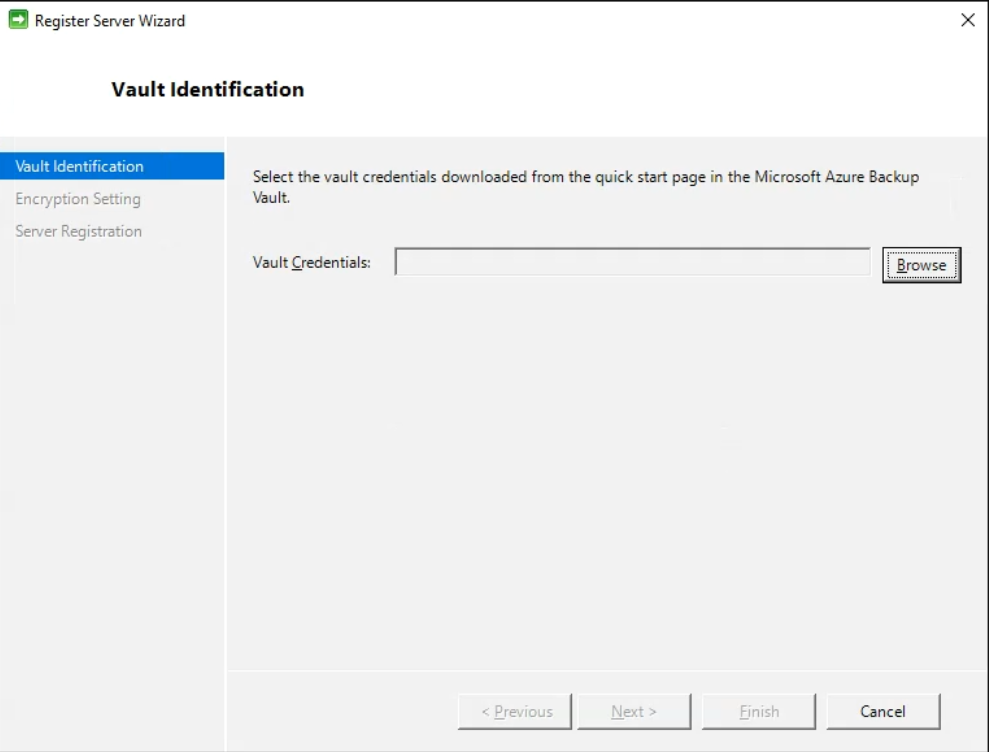
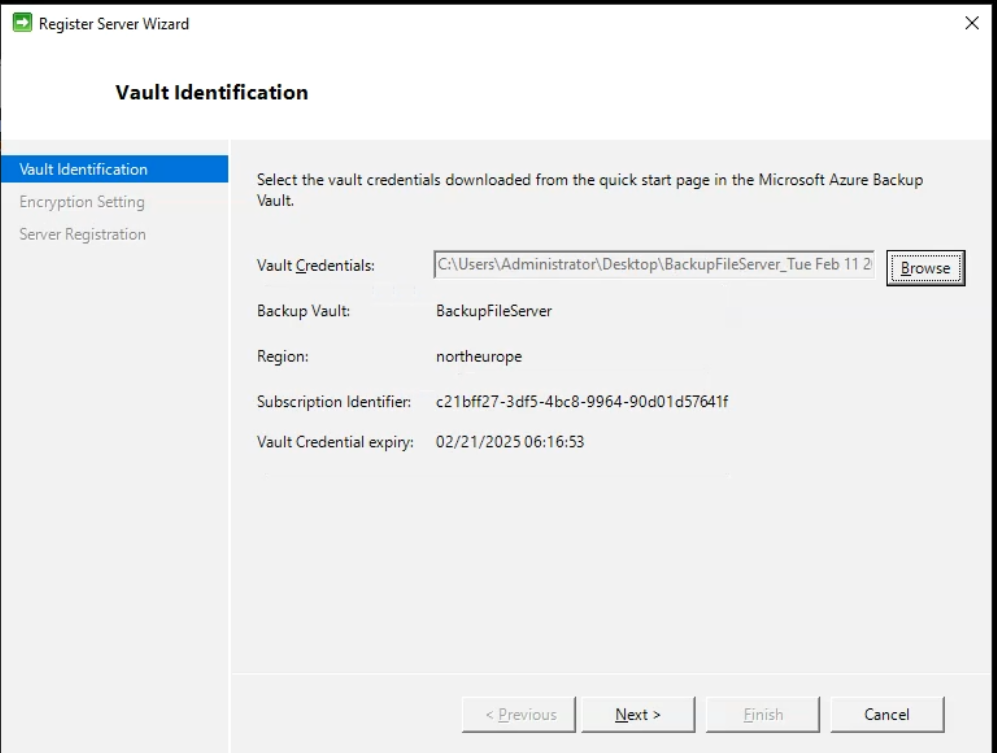
7. Prepare infrastructure: Here you can follow the steps and download MARS which is the software to install on your server and the vault to connect the software with the vault.
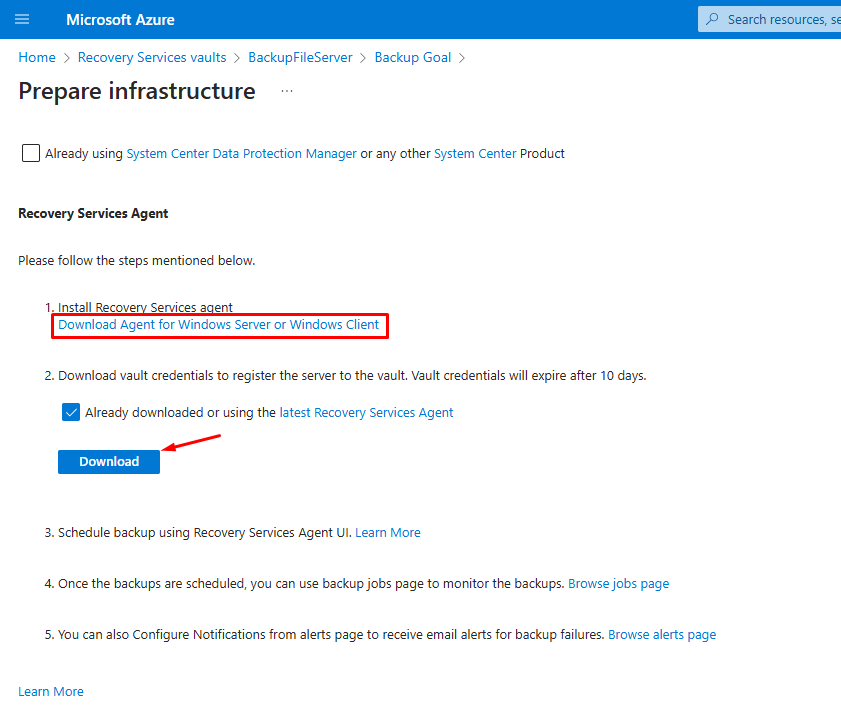
Step 3: Prepare your On-Premises Server
Install the Microsoft Azure Recovery Services (MARS) agent on your local file server:
- Download the MARS agent and run the installer on your file server.
- Once installed, open the agent an configure it by connecting it to your Azure Recovery Services vault using the credentials you obtained during the vault setup.
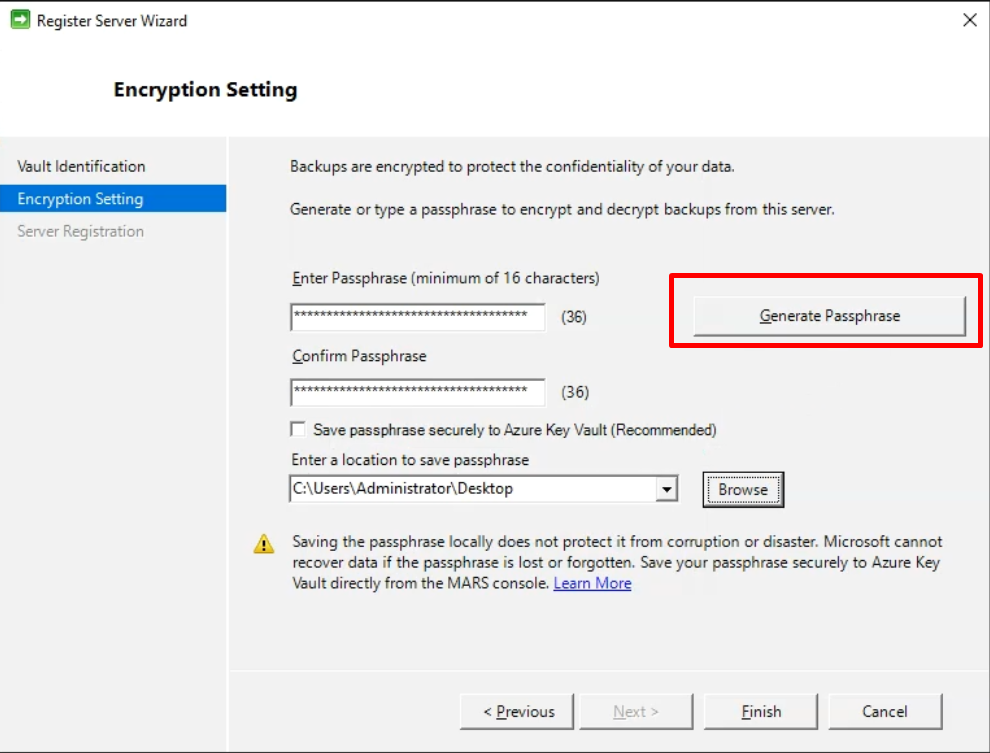
3. After that, you need to Generate Passphrase and save the key. Generate Passphrase key is important beacuse it serves as a key security feature in protecting your backup data.
Step 4: Configure the Backup
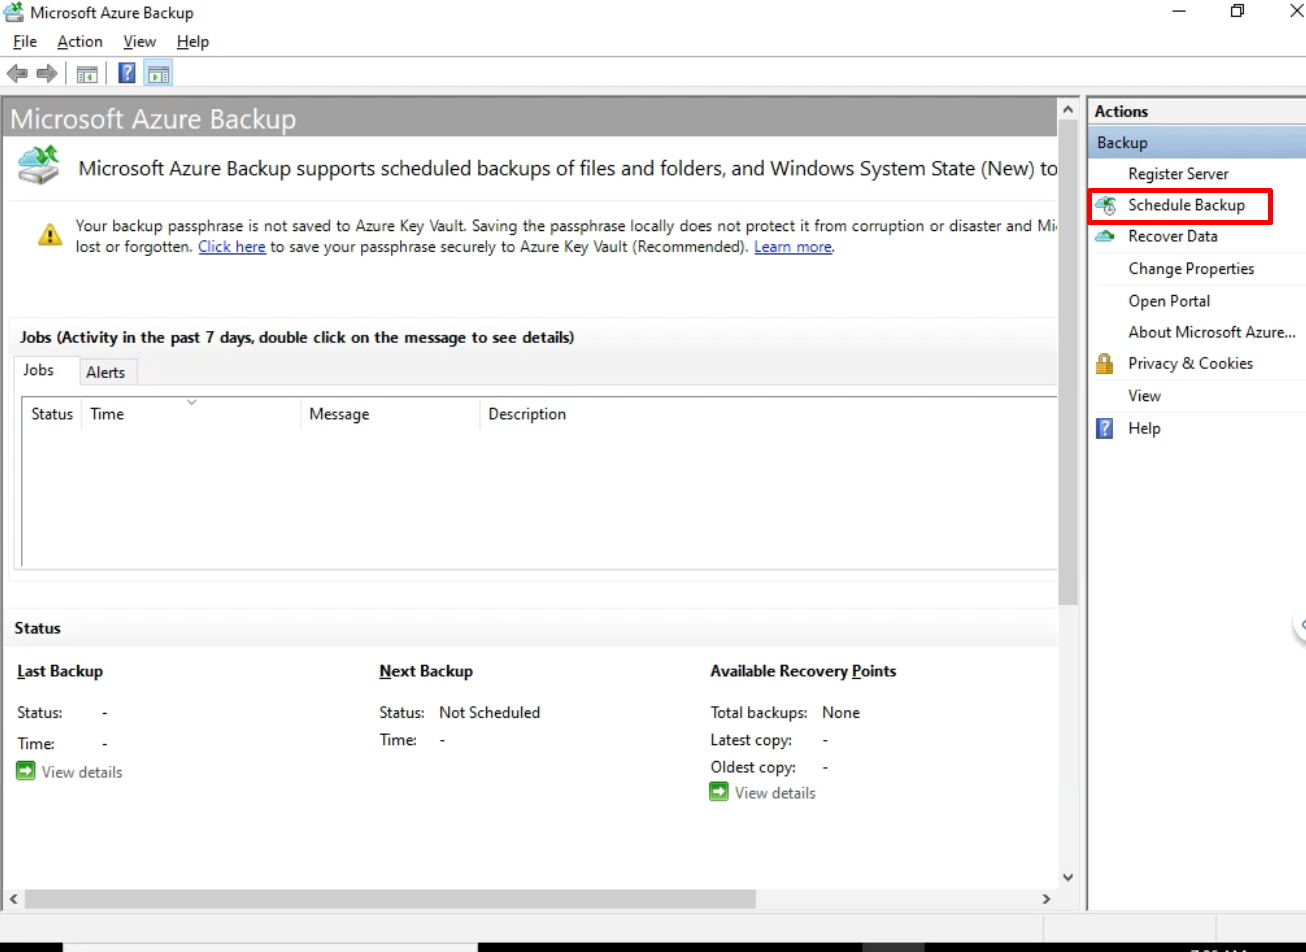
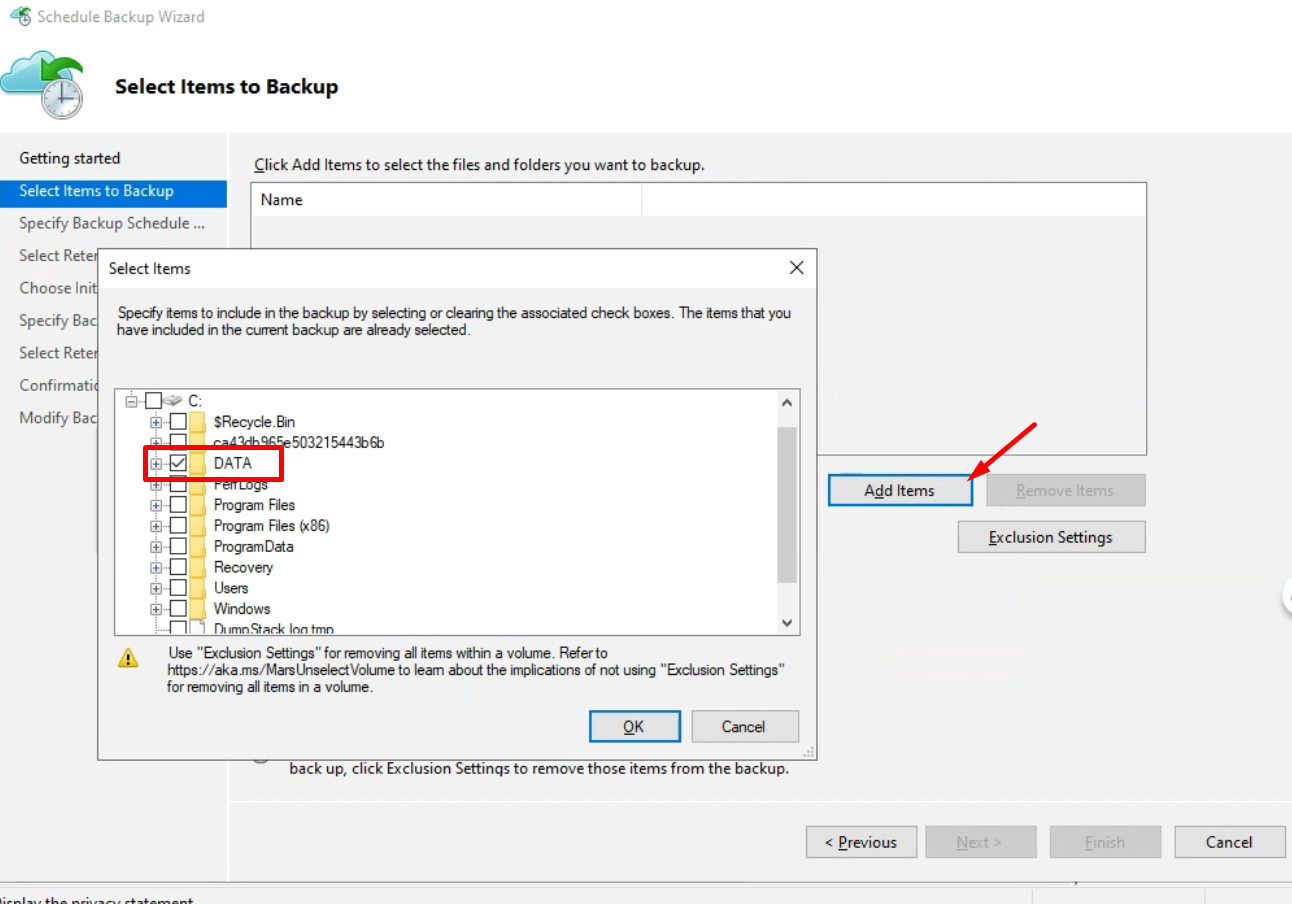
1. In the MARS agent, click on "Schedule Backup" to start the Backup Wizard.
2. Define what files or directories you want to back up.
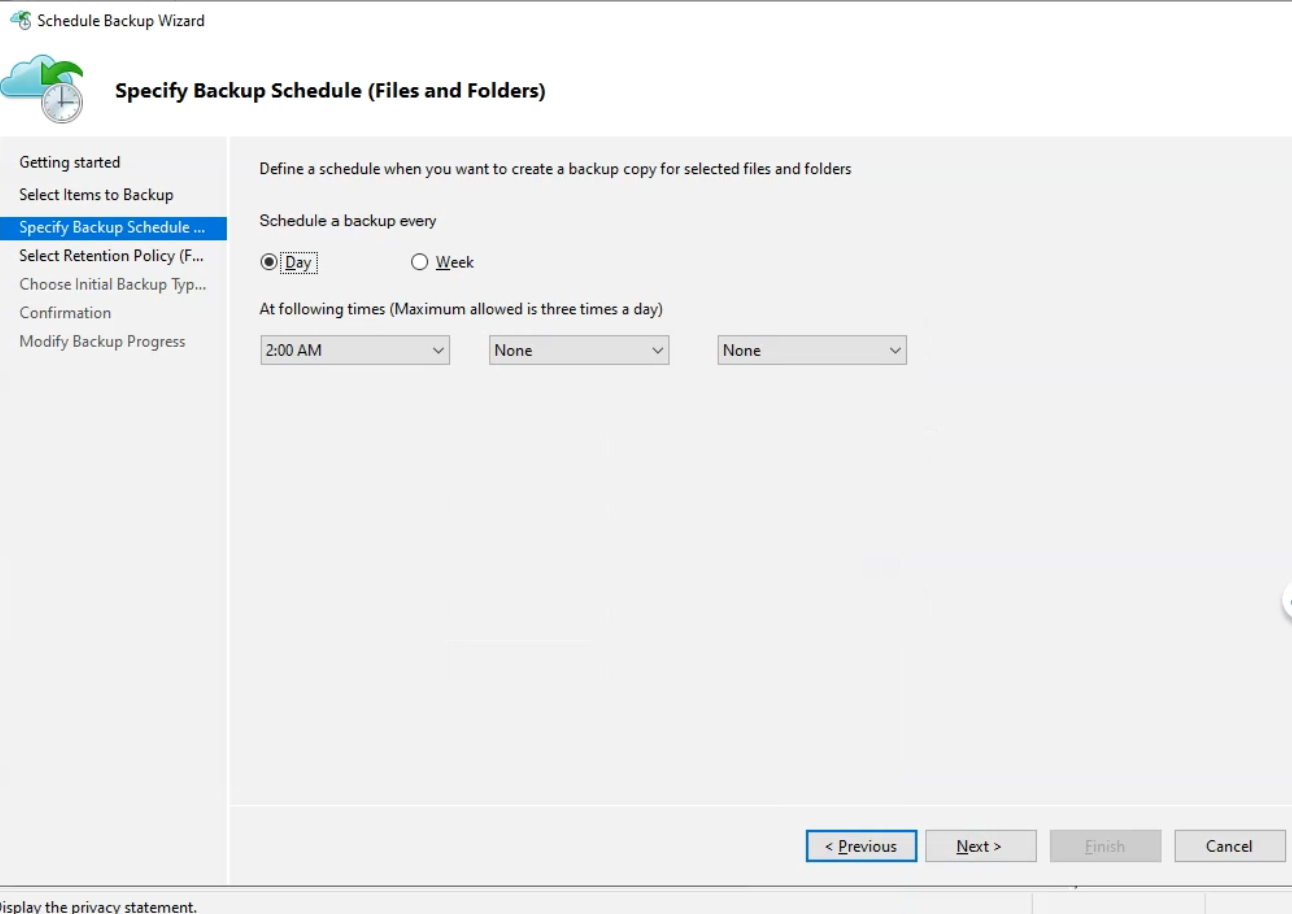
3. Set a schedule for your backups. Daily backups are recommended for most businesses.
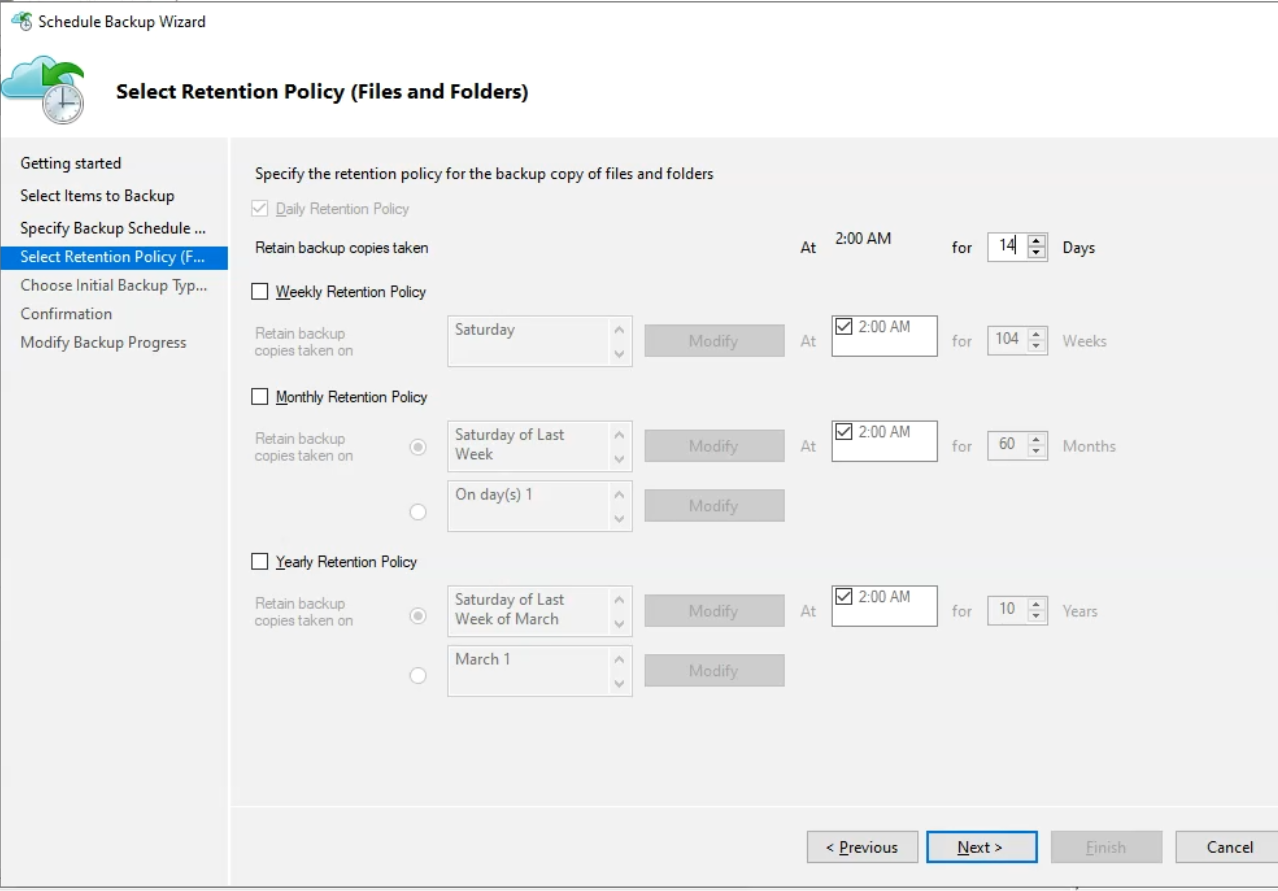
4. Configure retention settings to determine how long your backups should be stored in Azure.
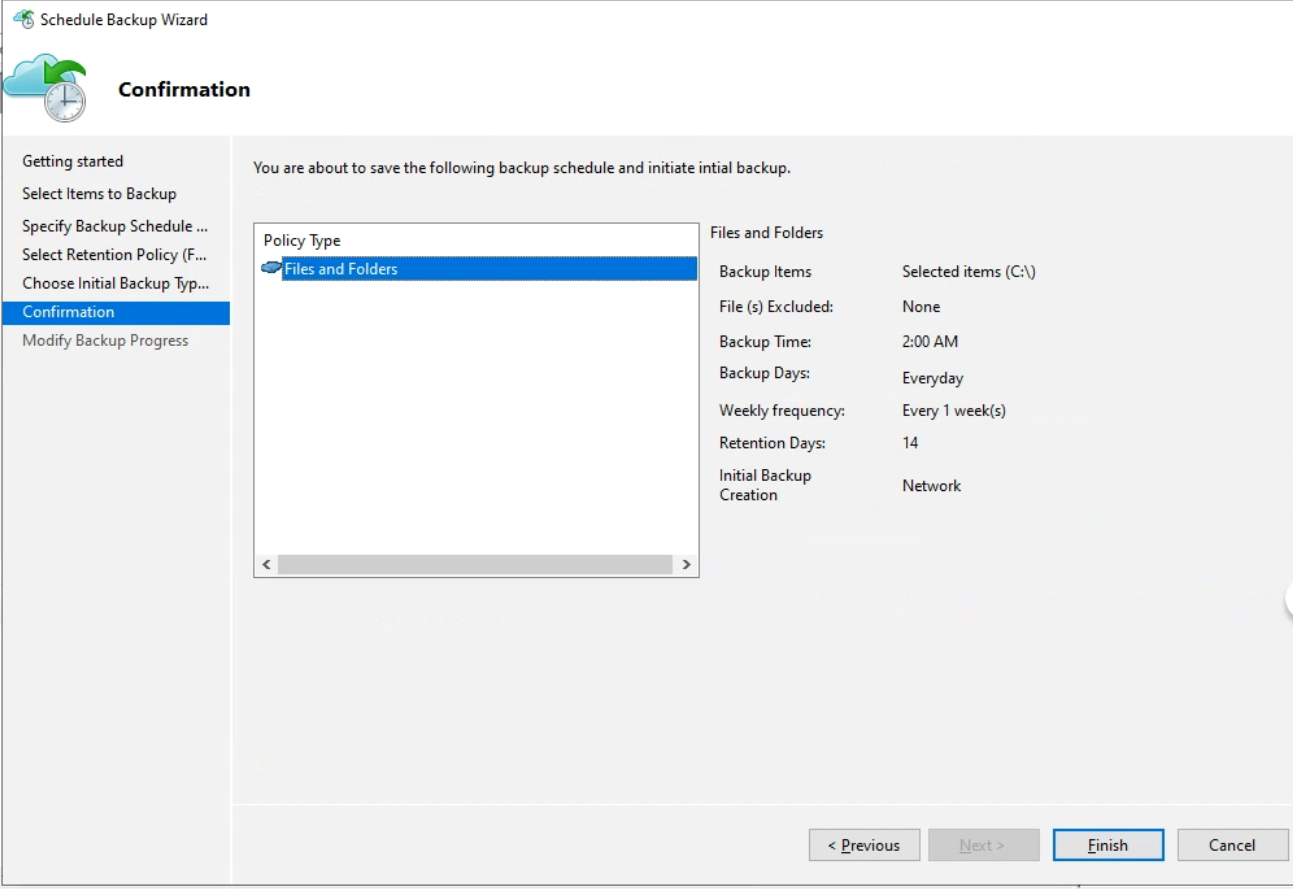
5. Confirm and click Finish
Step 5: Initiate a Backup Job
Once you've configured your settings, initiate a backup job to start backing up your data to Azure:
- In the MARS agent, click on "Back Up Now."
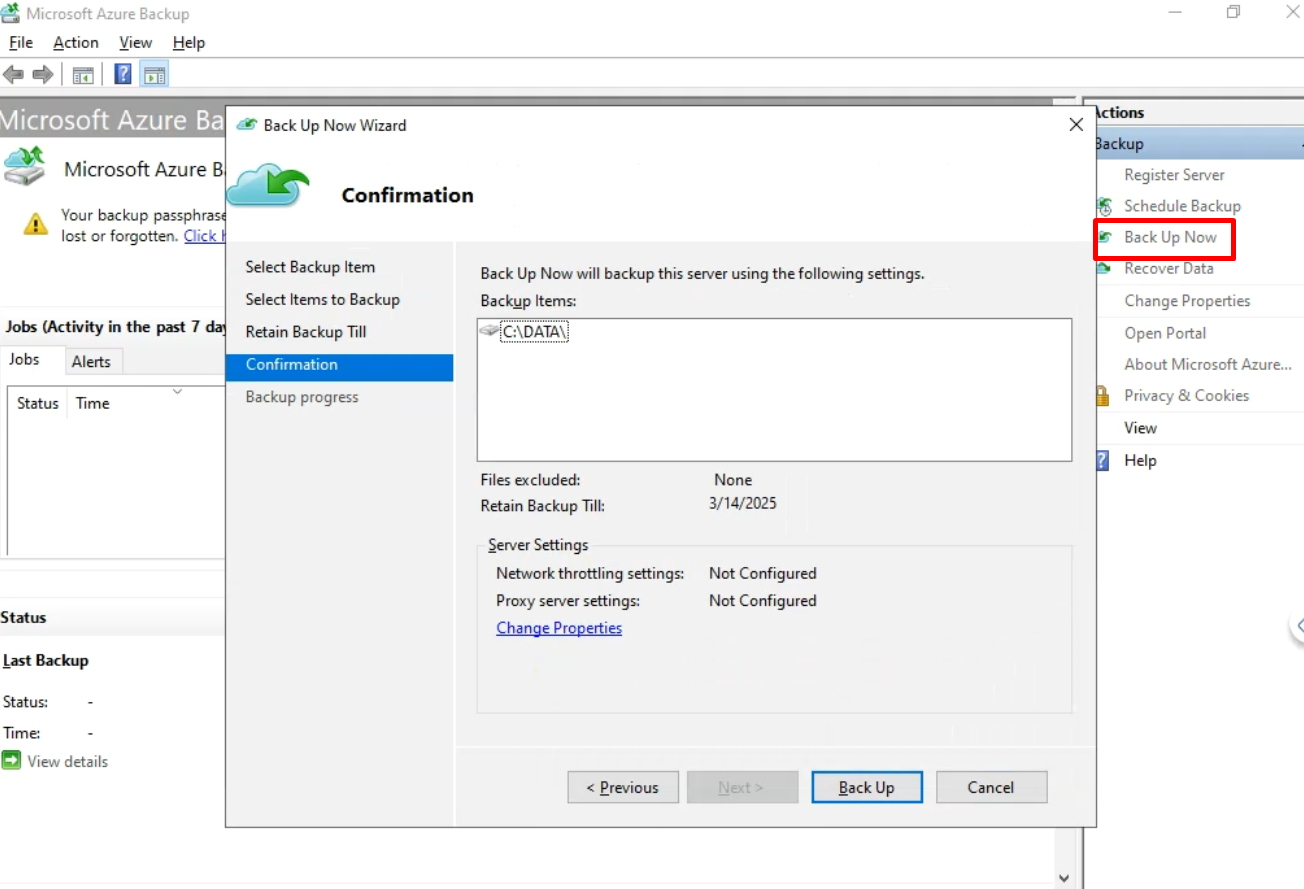
2. Check the job status in the agent dashboard to ensure it completes successfully.
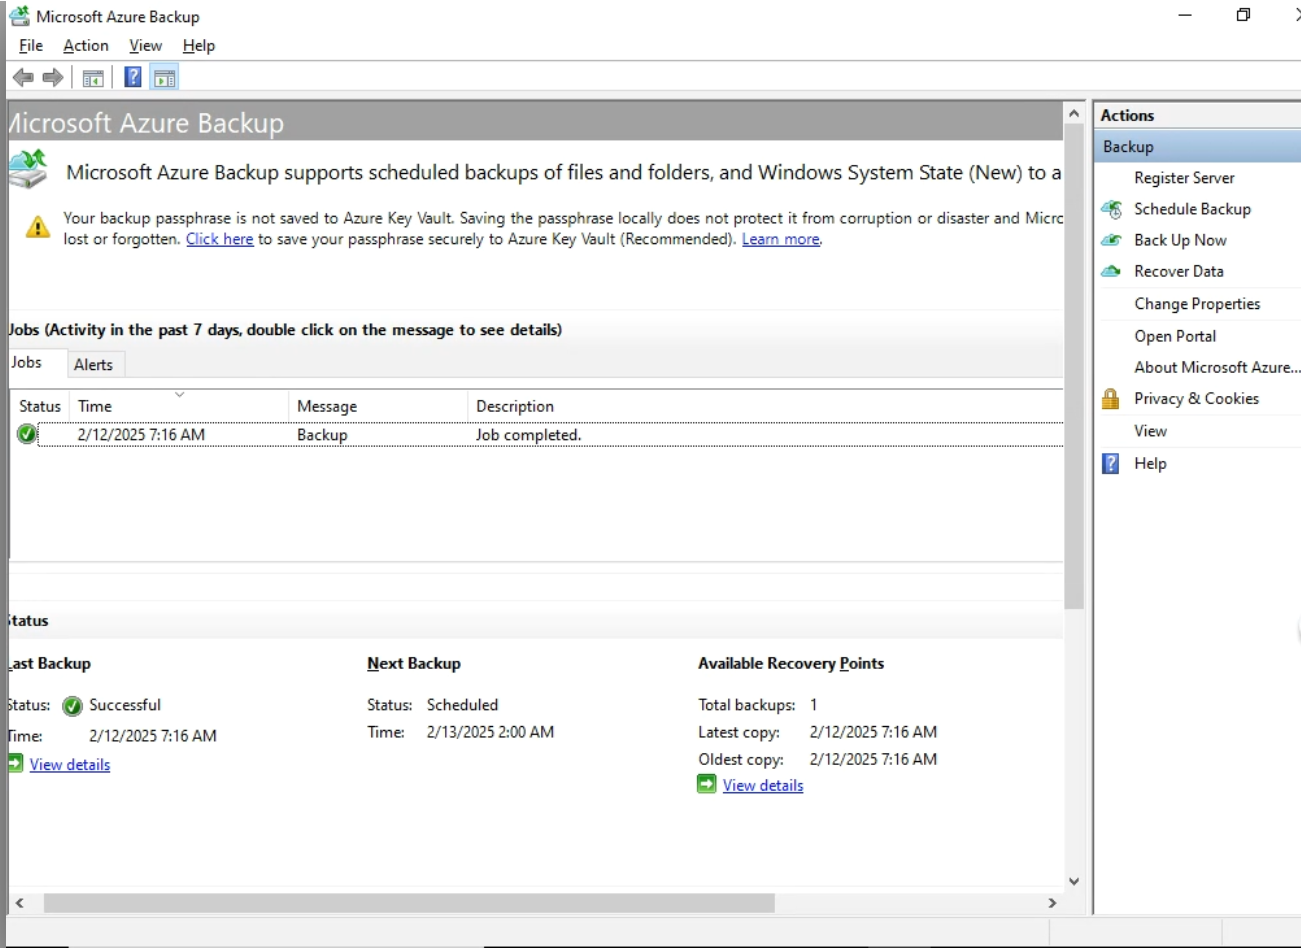
Step 6: Monitor and Manage your Backup
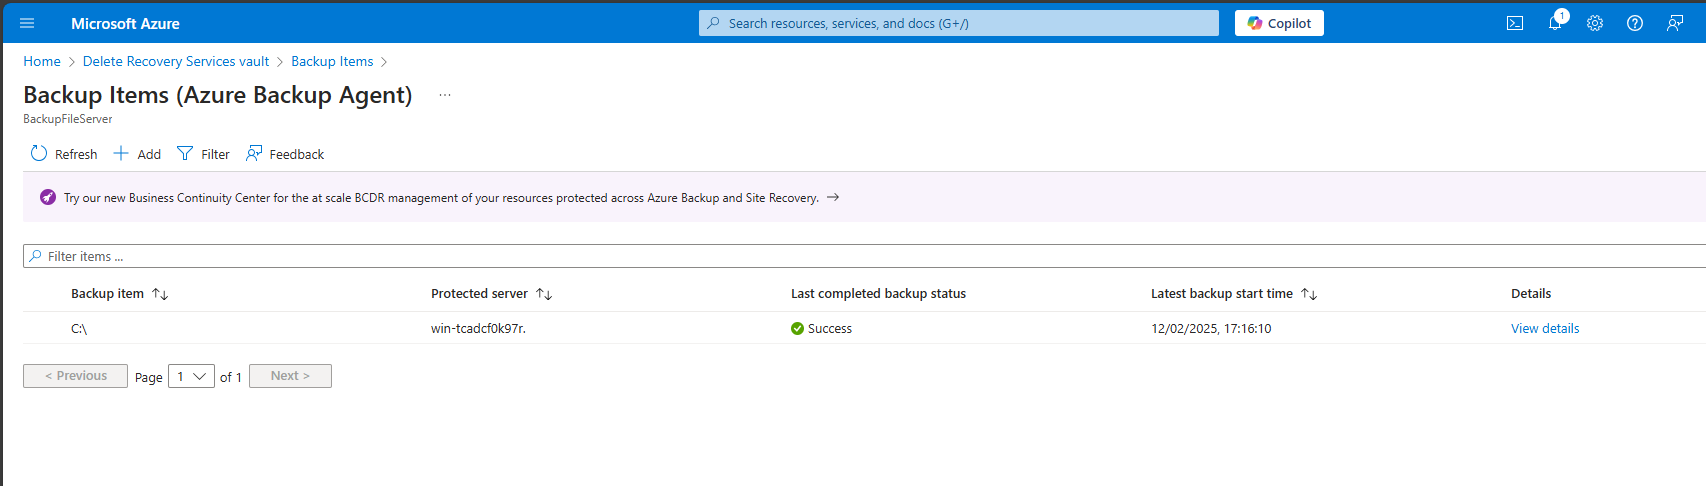
Regularly monitor the Azure portal to manage backup activities and oversee tasks related to your Recovery Services vault. This involves reviewing job history, recovering data, and adjusting backup settubgs as needed.
Conclusion
Configuring Microsoft Azure Backup for an on-premises file server is critical process that ensures data security. By following these steps, users can back up their data to the cloud without requiring extensive Microsoft Azure expertise. For businesses in Cyprus and Athens, collaborating with a Microsoft Azure expert such as IBSCY, which employs Mars for Azure backup solutions, facilitates efficient management of data backup needs.
Note: Utilizing Azure Backup safeguards data against physical damage and cyber threats, making it an effective choice for businesses worldwide.
 |
Maria Charilaou, is an engineer at IBSCY. She holds a diploma in Network and Computer technician and she is pursuing a degree in Computer Science, both from Cyprus College. Sha has been a part of the IBSCY team since 2024. |
